i had my new kosugi neighbor, linda, over for dinner tuesday, so i made a big pot of chili on monday. i hope you're not thinking, "nice, laura, way to serve your guest leftovers," because it's no secret that chili tastes better the next day. this is a fairly good size recipe, maybe 6-8 servings. chili keeps really well (in the freezer, too), and i can eat it for four days without getting sick of it, so i always make a big pot. and for as unjapanese as this dish is, the ingredients are really easy to find and fairly inexpensive. chili is just really fun to make, and pretty foolproof. the reason why there are no how-to pictures is that there is really nothing complicated about the process. it's all about the spices; you should just keep tasting and adding things until it's exactly how you like it.
ingredients
250 g dry pinto beans (or 2 cans) (1)
1 tbsp olive oil
1 1/2 yellow onion, diced
1 red bell pepper, diced
5 small green peppers, diced
2 cloves garlic, minced
1 tbsp paprika (2)
2 tbsp cumin (3)
3 tbsp chili powder (4)
350 g ground beef
2 cans tomatoes (5)
1 bottle tomato sauce (6)
1 tsp salt
dash pepper
hot sauce to taste
(1)うずら豆, (2)パプリカ, (3)クミン, (4)チリパウダー, (5)ホールトマト, (6)トマトピュレー
i got the chili powder and hot sauce at yamaya in takaoka. everything else is from e-town in kosugi.
i listened to shaolin soul, volumes 1 & 2 while making my chili.
let's go!
1. a. buying beans--i've only ever found canned beans at foreign food groceries, and those were kind of expensive. kidney beans or even black beans would work, too. if you buy dried beans at the grocery, be careful not to buy azuki beans (小豆); the big ones kind of look like kidney beans. they're sweet and delicious, but not what you want for chili--pinto beans are tan with little dark dots. if in doubt, you can always hold up the bag and ask the checker if they are sweet. that's what i finally did :-/
b. cooking beans--if you bought canned beans, skip this part. for dried beans, rinse them and check to make sure there are no pebbles or weird freaky beans. soak for 4-6 hours in a bowl with a 1:3 bean to water ratio. then boil beans with a tsp of salt for about two hours, until tender. when they are finished, drain the water and gently rinse. set aside for the moment.
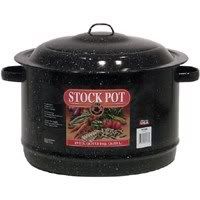
2. heat oil in a stock pot and add garlic, red pepper, green pepper, and onion. sweat until veggies begin to get tender (3-5 minutes)
3. add paprika, cumin, and chili powder. make sure keep stirring things around so that your spices don't burn on the bottom of your pan.
4. add the ground beef. some people freak out about the raw meat touching the vegetables, and it may well be wrong, but i do it all the time--no one has ever gotten botulised at one of my dinners. you'll be cooking it well done anyway, but if it bothers you, you can cook the meat in a separate pan and add it to the veggies.
5. when the meat is done, add the tomatoes, tomato sauce, beans, salt, pepper, and hot sauce. let everything get hot, and then turn the heat down to low.
6. now, this is the most important part. at this point you should stir everything up and taste. now is the time to add more cumin, chili powder, salt, hot sauce, or whatever you need. if you don't know what you're doing, just add a little at a time. also, if it is too thick, add a little water . if it is too thin, add tomato paste (トマトペースト). just keep in mind that it will thicken up overnight.
7. when it's just right, put it in the refrigerator. eat it tomorrow.
enjoy!
this is just how i make chili. it's really basic, and sometimes i add different stuff just for fun. salsa, beer, mustard, oregano, celery, worcestershire, and sausage are some things you could play with that would work. if you are not a cumin fan, you might want to hold back a little, because i love it, and i always put a lot in. anyway, linda seemed to like it. we ate this on rice when she was over, but where i'm from we eat it on spaghetti. it's also good on a salad with sour cream or over eggs.
Tuesday, August 28, 2007
chili

Tuesday, August 21, 2007
tomato, cucumber, and onion salad
it's been unbearably hot and humid for the last two weeks, so i thought i'd make something simple and summery. the cool, crisp taste of veggies and vinegar make this a wonderful summer snack. we all have food that reminds us of childhood, and this is one of mine. my mom used to make this all the time when i was growing up, and eating it reminds me of corn on the cob, fried chicken, ham and beans, cornbread, and fried okra. you know, the kind of stuff your mom probably made if you were lucky enough to be born in the south ;)
ingredients
1 tomato, wedged
1 cucumber, sliced
1/2 onion, julienned
3 tbsp red wine vinegar
1 tsp sugar
3/4 tsp salt
dash pepper
i bought the red wine vinegar at marushin in takaoka. everything else is from e-town in kosugi.
i listened to freakwater--old paint while making this.
let's go!
1. cut your vegetables. some people don't like skin on their cucumbers, but i do. however, japanese cucumbers have a bigger skin to flesh ratio than the cucumbers i'm used to, so i just cut half of the skin off in stripes down the length of the cucumber before slicing. also, i would prefer to use a red onion, but my grocery doesn't always have those. yellow works just fine. i put the onion on the bottom to make sure it gets thoroughly soaked in vinegar.
2. mix the vinegar, sugar, salt, and pepper together. you can adjust if there's too much/not enough sour/sweet/salty (i like things really sour and salty). also, if you don't have red wine vinegar, you can always find rice vinegar (in the aisle with all the sushi stuff). you'll probably have to adjust the proportions--rice vinegar is sweeter, and some rice vinegar has already been seasoned with salt and sugar.
3. cover and let sit in the refrigerator for a couple of hours. overnight is even better.
enjoy!
i had some of this for a late night snack and finished it off in the morning at breakfast. also, if you chopped everything into little pieces and maybe added some dill, this would make an nice little relish to put on fish. 
Sunday, August 5, 2007
bubble & squeak with mushroom cheese sauce
i've had niko staying with me for a few days already, and i invited max to stay over friday night for dinner and a movie. i'm not a huge breakfast person, but i thought having two hungry boys at my house in the morning would be the perfect time to make some bubble & squeak. when i worked at the pub, i used to eat it with cheese on top, which was super yummy. i had some mushrooms, so i thought i'd make some mushroom cheese sauce to put on top, too.
ingredients for bubbles
6 potatoes
40g butter
100 mL milk
2 tsp salt
1 tsp pepper
1 clove garlic, minced
1 red bell pepper
2 green bell pepper
1 medium yellow onion
ingredients for sauce
2 eringii mushrooms (1)
10 grams butter
250 mL milk
200 g shredded or grated cheese (not mozzarella)
pinch of salt
dash of pepper
(1) エリニギ
i bought all these ingredients at the jusco in takaoka.
for added deliciousness, listen to morcheeba--big calm while cooking.
let's go!
bubble & squeak
1. after doing some googling, i'm fairly certain this is not the traditional way of making bubble & squeak, but this is how i learned to do it, and also it's delicious so let's not argue about it. when we made bubble & squeak at the pub, we used mashed potatoes from the night before. unless you usually have mashed potatoes lying around at breakfast time, you're going to have to think ahead and make some up the night before.
2. peel and quarter the potatoes. boil for about 45 minutes. when the potatoes are done, you should be able to easily crush them with tongs.
3. drain and mash the potatoes. if you don't have a masher, you can use a fork, a whisk, or one of the beaters from an electric mixer. add the milk, butter, salt, pepper and garlic. you can tweak the amounts on these ingredients according to your tastes; however, i would advise you to hold back on the milk and butter as too much of these things will make your bubbles fall apart.
4. chop the bell peppers and the onion. sauté in butter until tender--the onion will start to become translucent.
5. you should let the mashed potatoes and the onion-pepper mixture cool overnight. in the morning, mix these together. use your hands--it feels funny.
6. use the mixture to make patties about 2 or 3 cm thick. i made 6 big ones out of my mixture, but in retrospect, i think i should have made 8 or 9 medium sized patties. you probably don't want the diameter to be bigger than the width of your spatula.
7. it's probably a good idea to go ahead and make your sauce now and then come back to finish up the bubbles.
8. melt about 20g of butter in a heavy skillet. brown bubbles on both sides. ok, so that sounds really easy, but here's the deal--the bubbles are going to stick to your pan. you will have a lot easier time if your bubbles are small enough to fit on the spatula. also a plastic spatula doesn't seem to cut it--use metal. if you have a second spatula, big wooden spoon, a okonomiyaki spatula, or a rice paddle, use that to kind of hold the bubble in place while you scrape from underneath. hopefully, they will stay in one piece with nice brown circles on both sides, but check out this picture.
9. yikes! i mean, the one on the top left isn't too bad, but what happened to the poor little guy on the bottom? yeah, i messed up. i think it was one of these things: i forgot about the butter in the veggie mixture and put too much in my mashed potatoes, i made my patties too big, and i tried to use a plastic spatula. anyway, if your bubbles look like this, don't worry. you'll be covering them with sauce, and the boys both agreed they were very delicious anyway. so, speaking of sauce...
mushroom cheese sauce
1. chop the mushrooms and sauté until tender. turn off the heat.
2. add the milk slowly while stirring quickly. heat up to just before a boil, and then turn off the heat.
3. stir in the cheese. i used a cheddar type mix that had a picture of omurice on the package and a little leftover summer comté, shredded. you could also use parmesan or shred those little baby cheese squares. whatever you do, don't use the ubiquitous pizza cheese. it will clump up and you will be left with hot milk with a ball of gooey cheese.
4. add salt and pepper.
enjoy!
i served the bubbles with scrambled eggs, wilted spinach, and pan fried tomatoes. i just poured the sauce over the whole thing. it was pretty delicious--we ate everything and then laid around in a dazed food coma.
Wednesday, July 4, 2007
chicken and saffron dumplings
mmm...chicken & dumplings. i like to make things from scratch, but i don't mind telling you i've used bisquick every time--the mix makes perfect dumplings. unfortunately, bisquick is hard to come by these days, though i heard a rumor you can score it at the marushin in toyama shi. today we will make the dumplings from scratch. i threw in a little saffron just to make things fun. ingredients for chicken stock
1 carrot
1 stalk celery
1 onion
2 bouillon cubes (1)
1 tsp salt
1 tsp pepper
1 clove garlic, minced
1 pack boneless chicken thighs
60 mL milk
ingredients for dumplings:
350 mL all purpose flour (2)
2 tsp baking powder (3)
1/2 tsp salt
1 packet saffron
3 tsp shortening (4)
175 mL milk
日本語: (1) チキンコンソメ, (2) フラワー, (3) ベーキングパダー, (4) ショートニング
i bought the saffron at yamaya in takaoka. everything else i bought at al plaza in kosugi.
let's go!
chicken stock
you might be tempted to buy chicken breasts, or cut off that big piece of fat, but you're gonna lose a lot of flavor that way, so please refrain.
1. cut the carrot, celery (don't throw away those leaves!), and onion into big chunks--you need not make it pretty. don't cut up your chicken just yet. throw all ingredients except for the milk into a big pot. add water until just covered.
2. bring it to a boil, and then lower to a simmer. let that bad boy cook for 60-75 minutes. smoke a cigarette and have a glass of wine.
3. mmm, smell that? nice, yeah? ok, now you want to pull the chicken pieces out and set aside.
4. carefully pour the contents of your stock pot into a colander placed inside a mixing bowl. pull the colander out. check out your mixing bowl--that's chicken stock! poor the stock back into the stock pan. 5. you have a couple of options with the mushy veggies left in your colander. first, you can do what i always do, and throw them out. second, you can do what i did this last time, and kind of smash them through the holes of your colander into the stock. i think this last idea turned out just fine, and is less wasteful. whatever you do, the point is the broth should be relatively smooth, without chunks of mushy vegetables.
6. pour the milk in, stir a bit, and put the stock back on a burner turned very low, just to keep things hot. dumpling time!
dumplings
1. sift the dry ingredients together into a mixing bowl. 2. mix in the shortening--i find a fork to be a nice tool for this job. you'll know it's mixed well when there are no big chunks and it feels kind of mealy between your fingers.
3. now, mix in the milk. ooooooooh--magic! isn't that cool? i love saffron! don't get crazy with the mixing or your dumplings will have a weird texture. just enough that you don't have chunks of flour or pools of milk. now you're ready to get your hands messy!
the big show
1. bring your broth to just boiling--some kind of science happens when you drop the dumplings in, and it could get messy if you drop them into a rolling boil.
2. the dough is sticky (if it is too too sticky to work with, you can add a little more flour), so really the easiest way to do this is with your hands. pull a piece the size of one of those little mochi balls on a stick and flatten it to about 1 cm thickness in your hand. note: your dumpling may not be a perfect shape. don't worry about it.
3. gently drop the dumpling into the broth. it should rise to the top on its own and start getting bigger. 4. the dumplings will eventually take up the whole surface area, but just push them to the side with a spoon to make room for more. do not stir or otherwise play rough with the dumplings while they are cooking, or you might make gravy.
5. dumplings don't take long to cook, maybe 10 minutes. i always test by biting one--if it's good, they're done.
6. take the fat off the chicken and toss it. cut (or even better, shred) the chicken into tiny pieces. throw it in with your dumplings and mix it in a bit.
7. good work! spoon the dumplings into a bowl, and enjoy!
